Magento Expert Forum - Improve your Magento experience

Page 1 of 2 12 LastLast
Results 1 to 20 of 23

Adding new category attribute in Magento

  1. #1
    Junior Member golddev's Avatar
    Join Date
    Mar 2013
    Posts
    41
    Thanks
    1
    Thanked 9 Times in 5 Posts

    Post Adding new category attribute in Magento

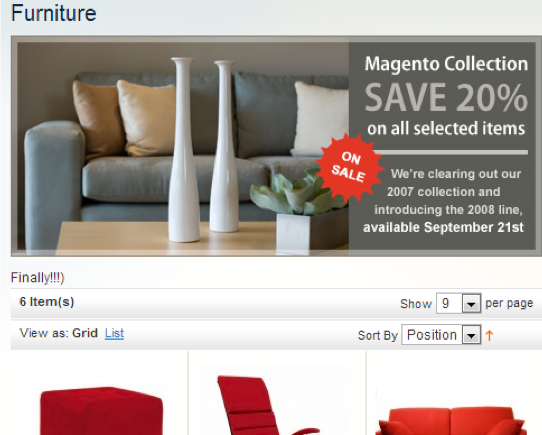
    In this article we would like to show you how to add a new custom category attribute. Let’s say, this attribute is needed to display some content on the category page.

    First of all, we need to create a new module for adding custom category attribute, we will call it “Custom Category Attribute”.

    Step 1. Create new module

    We should let Magento know about our new module. Initial configuration file is located in ‘app/etc/modules/Atwix_CustomCategoryAttribute.xml’.

    Atwix_CustomCategoryAttribute.xml

    HTML Code:
    <?xml version="1.0"?>
    <config>
        <modules>
            <Atwix_CustomCategoryAttribute>
                <active>true</active>
                <codePool>community</codePool>
            </Atwix_CustomCategoryAttribute>
        </modules>
    </config>
    It means that the module is active and it is located in the community code pool.

    Step 2. Configure module

    Module configuration file is located in ‘app/code////etc’ and its name is config.xml – note, that in our case this looks like ‘ app/code/community/Atwix/CustomCategoryAttribute/etc/config.xml’.

    config.xml

    HTML Code:
    <?xml version="1.0"?>
    <config>
        <modules>
            <Atwix_CustomCategoryAttribute>
                <version>0.0.1</version>
            </Atwix_CustomCategoryAttribute>
        </modules>
     
        <global>
            <resources>
                <add_category_attribute>
                    <setup>
                        <module>Atwix_CustomCategoryAttribute</module>
                        <class>Mage_Catalog_Model_Resource_Eav_Mysql4_Setup</class>
                    </setup>
                    <connection>
                        <use>core_setup</use>
                    </connection>
                </add_category_attribute>
                <add_category_attribute_write>
                    <connection>
                        <use>core_write</use>
                    </connection>
                </add_category_attribute_write>
                <add_category_attribute_read>
                    <connection>
                        <use>core_read</use>
                    </connection>
                </add_category_attribute_read>
            </resources>
        </global>
    </config>
    As you can see, configuration file is not large, there are two nodes only: module version and resources for install script. Install script helps us to create a new attribute. In the node we defined the class for our install script which will be used for the extension. Working with methods of this class helps to create, update, remove attribute (etc). And the node says that script must be located in the folder with the same name (in our case path will be ‘app/code/community/Atwix/CustomCategoryAttribute/sql/add_category_attribute’)

    Step 3. Create attribute

    Another important thing is to create install script file in the folder ‘add_category_attribute’, and the file name depends on the module version, so it looks like ‘mysql4-install-x.x.x.php’, where x.x.x is the version of the module.

    mysql4-install-0.0.1.php

    PHP Code:
    <?php
    $this
    ->startSetup();
    $this->addAttribute('catalog_category''custom_attribute', array(
        
    'group'         => 'General',
        
    'input'         => 'textarea',
        
    'type'          => 'text',
        
    'label'         => 'Custom attribute',
        
    'backend'       => '',
        
    'visible'       => true,
        
    'required'      => false,
        
    'visible_on_front' => true,
        
    'global'        => Mage_Catalog_Model_Resource_Eav_Attribute::SCOPE_GLOBAL,
    ));
     
    $this->endSetup();
    As a result, we created a new attribute in the category with label ‘Custom attribute ‘. This attribute is a text area and it must be visible on the frontend. Check this out!

    Step 4. Check result

    Here, let’s clear cache and after this, go to Manage Categories – in ‘General’ tab you will see a new attribute: ‘Custom attribute’.


    Moreover, to see the content from ‘Custom attribute’ on the frontend in the category page – you need to use the helper for reading attribute in the template of this page (‘app/design/frontend/ //template/catalog/category/view.phtml’), check please the following code:

    PHP Code:
    ...
    <?php if($_customAttribute $this->getCurrentCategory()->getCustomAttribute()): ?>
        <?php echo $_helper->categoryAttribute($_category$_customAttribute'custom_attribute'?>
    <?php 
    endif; ?>
    ...
    As this code was put before ‘product list’ output, so after refreshing a page we will see the result:


    Following all these steps, it will be great to enable wysiwyg editor for a new attribute, that will give us an opportunity to place different content with an inline styles in simple way.

    Step 5. Update attribute

    For each version of the module, it is also possible to have upgraded scripts which filenames are of the form mysql4-upgrade-0.0.1-0.0.2.php. It seems to be the best solution to update the attribute.

    mysql4-upgrade-0.0.1-0.0.2.php

    PHP Code:
    <?php
    $this
    ->startSetup();
    $this->addAttribute('catalog_category''custom_attribute', array(
        
    'group'         => 'General',
        
    'input'         => 'textarea',
        
    'type'          => 'text',
        
    'label'         => 'Custom attribute',
        
    'backend'       => '',
        
    'visible'       => true,
        
    'required'      => false,
        
    'wysiwyg_enabled' => true,
        
    'visible_on_front' => true,
        
    'is_html_allowed_on_front' => true,
        
    'global'        => Mage_Catalog_Model_Resource_Eav_Attribute::SCOPE_GLOBAL,
    ));
     
    $this->endSetup();
    As well, method addAttribute can not only create, but also update the attribute – that’s why, you may also use method updateAttribute.

    Step 6. Check updated result

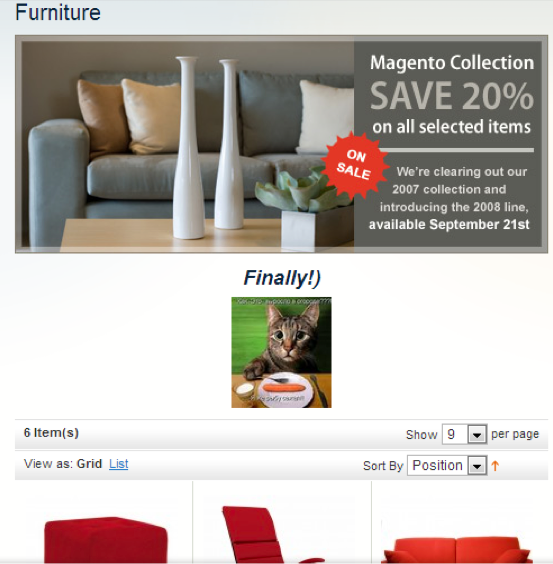
    At last, we clear cache and see the button ‘ WYSIWYG Editor ‘ near ‘Custom attribute’. Also, it is necessary to use editor to change the content in this attribute, insert some image, format text and at the end – to save the changes. After all, you should refresh category page and see the result:


    We hope this article will help you to work with Magento development. Thanks for reading!

    View more threads in the same category:


  2. #2
    Junior Member Kathy Daunt's Avatar
    Join Date
    May 2013
    Posts
    66
    Thanks
    10
    Thanked 4 Times in 4 Posts

    Default

    Thanks found helpful.

    Thanks

    Magento reporting

  3. #3
    Junior Member
    Join Date
    Feb 2014
    Posts
    13
    Thanks
    0
    Thanked 1 Time in 1 Post

    Default

    thks for your useful post!

  4. #4
    Junior Member Ocodewire's Avatar
    Join Date
    Jan 2014
    Location
    India
    Posts
    244
    Thanks
    10
    Thanked 16 Times in 15 Posts

    Default

    For the installer scripts in this guide, they should really be revised to make use of this approach to instantiate the configuration option array of new attributes.

    $options = $this->_prepareValues(array( /* your options */ ));
    $this->addAttribute(Mage_Catalog_Model_Category::ENTITY, 'your_attribute_code', $options);

    For more information on what options can all be passed to $this->_prepareValues(), review the following methods:
    Mage_Catalog_Model_Resource_Setup::_prepareValues( )
    Mage_Eav_Model_Entity_Setup::_prepareValues()

  5. #5
    New member
    Join Date
    Mar 2017
    Location
    Afghanistan
    Posts
    1
    Thanks
    0
    Thanked 0 Times in 0 Posts

    Default К &#171;Титанику&#187; з

    у нас на этом интернет-сайте http://people4people.ru/ подобран громадный выбор новостей о туризме.

  6. #6
    New member
    Join Date
    Jul 2017
    Posts
    6
    Thanks
    0
    Thanked 0 Times in 0 Posts

    Default

    Great post! I am actually getting ready to across this information, is very helpful my friend. Also great blog here with all of the valuable information you have. Keep up the good work you are doing here.
    bloxorz

  7. #7
    New member
    Join Date
    Oct 2017
    Posts
    5
    Thanks
    0
    Thanked 0 Times in 0 Posts

    Default

    it's been operating for a long time in this publish for a great concept on it. I truly very experience analyzing your true and beneficial post thanks and you guys doing the sort of great job keep it up
    ------
    router login

  8. #8
    New member
    Join Date
    Mar 2018
    Posts
    6
    Thanks
    1
    Thanked 0 Times in 0 Posts

    Default

    I found this as an informative and interesting post, so i think it is very useful and knowledgeable.- Gmail login

  9. #9
    New member
    Join Date
    Oct 2017
    Posts
    5
    Thanks
    0
    Thanked 0 Times in 0 Posts

    Default

    Quote Originally Posted by Sobhana123 View Post
    hi there.. really nice information.. i was looking for this since a long time…really appreciate the amount of work which you have put into to it.. thanks for sharing
    router login
    I admire the valuable information you offer in your articles.

  10. #10
    Junior Member
    Join Date
    Sep 2017
    Posts
    47
    Thanks
    0
    Thanked 2 Times in 2 Posts

    Default

    Thanks for the detailed informative post.

  11. #11
    New member
    Join Date
    Sep 2018
    Posts
    6
    Thanks
    0
    Thanked 0 Times in 0 Posts

    Default

    I tried the XML version:


    true
    community


    But, i think i am yet missing some points. I am developing a Magento sites for people who are interested in outsourcing development of their projects.

  12. #12
    New member
    Join Date
    Sep 2018
    Posts
    6
    Thanks
    0
    Thanked 0 Times in 0 Posts

    Default

    I am developing an offshore web development services site based on Magento for clients who are outsourcing development of their projects. I am trying to add new attributes but its still not working.

  13. #13
    Junior Member
    Join Date
    Aug 2018
    Location
    Indore,India
    Posts
    17
    Thanks
    0
    Thanked 0 Times in 0 Posts

    Default

    Hello !

    I have seen your requirement, I can help you with this.
    please add me on S_ky_pe : vishal.sanwar or email me on [email protected]
    So we can discuss further .

    Thanks

  14. #14
    Junior Member
    Join Date
    May 2018
    Posts
    52
    Thanks
    0
    Thanked 3 Times in 2 Posts

    Default

    Nice Post! Thanks for sharing this valuable information with us. Also great blog here with all of the valuable information you have. Keep up the good work you are doing here.

  15. #15
    Junior Member
    Join Date
    Sep 2018
    Location
    United Kingdom
    Posts
    228
    Thanks
    0
    Thanked 2 Times in 2 Posts

    Default

    first of all
    1 Create new module.
    2 Configure module
    3 Create attribute.
    4 Check result.
    5 Update attribute.

  16. #16
    Junior Member
    Join Date
    Nov 2020
    Location
    united kingdom
    Posts
    15
    Thanks
    0
    Thanked 0 Times in 0 Posts

    Default

    Create a new custom Magento 2 module. We should let Magento know about our new module. ...
    Configure module. Module configuration file is located in 'app/code////etc' and its name is config. ...
    Create attribute. ...
    Check result. ...
    Update attribute. ...
    Check updated result.

  17. #17
    Junior Member
    Join Date
    Sep 2018
    Location
    Oman, Muscat
    Posts
    2,084
    Thanks
    0
    Thanked 4 Times in 4 Posts

    Default

    Properties in Magento 2 are of extraordinary assistance! In any case, not all the time the default credits are sufficient with regards to fulfilling the business.

  18. #18

  19. #19
    Junior Member
    Join Date
    Jun 2016
    Location
    Bhavnagar, Gujarat, India
    Posts
    1,125
    Thanks
    0
    Thanked 2 Times in 2 Posts

    Default

    Hey,

    I found it useful. Also for Automatic and save your time you can use category Import/Export Magento 2 Extension. That helps admin to import or export category in bulk.

    Hope this helps you.

    Thank you.

  20. #20
    New member
    Join Date
    May 2023
    Posts
    5
    Thanks
    0
    Thanked 0 Times in 0 Posts

    Default

    Thanks for sharing a great guide.


    ______________________________
    Internet Radio

Page 1 of 2 12 LastLast

Similar Threads

  1. How To Add A Static Block To A Category Page
    By rocker in forum Webmaster & Administrator
    Replies: 2
    Last Post: 17-08-2017, 09:17 AM
  2. Replies: 1
    Last Post: 09-10-2015, 11:05 AM
  3. Adding Cache Support to Magento Blocks
    By sgdev in forum Magento Speed up, Performance and Optimize
    Replies: 2
    Last Post: 29-05-2014, 10:47 AM
  4. Adding currency to woocommerce?
    By speed2x in forum Wordpress
    Replies: 2
    Last Post: 31-07-2013, 12:47 PM
  5. Filter products by attribute on a Magento CMS page
    By david in forum Programming & Development
    Replies: 1
    Last Post: 18-04-2013, 11:19 AM

Tags for this Thread

Bookmarks

Posting Permissions

  • You may not post new threads
  • You may not post replies
  • You may not post attachments
  • You may not edit your posts
  •