

Favicon is short for “favorite icon,” and refers to the little icon on the tab of each browser page. Depending on the browser, the favicon also appears in address bar, just before the URL. Favicons are generally 16 x 16 pixels or 32 x 32 pixels in size. Magento accepts ICO, PNG, JPG, and SVG file types, although not all browsers support these formats. The most widelysupported file format to use for a favicon is ICO. There are many free tools available online that you can use to generate an ICO image or convert an exiting image to the format.You can change Favicon in Magento 2 by the following steps:Change Favicon:
- Step 1: Create a Favicon
- Step 2: Upload the Favicon to your store
- Step 3: Refresh the Cache
Step 1: Create a Favicon
- Create a 16x16 or 32x32 graphic image of your logo, using the image editor of your choice.
- (Optional) Use one of the available online tools to convert the file to the .ico format. Then, save the file to your computer.
Step 2: Upload the Favicon to Your Store
- On the Admin sidebar, click on Stores. Then under Settings, choose Configuration.
- In the panel on the left under General, choose Design.
- Expand the HTML Head section. Then, do the following:
* Click on Choose File. Then, find the favicon file that you prepared. * If you want to delete the current favicon, mark the Delete Image checkbox.
- When complete, click on Save Config.
Step 3: Refresh the Cache
- When prompted to refresh the cache, click the Cache Management link in the message at the top of the workspace.
- In the list, mark the Page Cache checkbox that is marked “Invalidated.”
- Set Actions to “Refresh.” Then, click on Submit.
- To view the new favicon, return to your storefront and press F5 to refresh the browser.
Ref: Magento 2 User Guide It comes to the end of tutorial: How to Change Favicon in Magento 2 . How to Change Favicon in Magento 2


 Reply With Quote


 Ref: Magento 2 User Guide It comes to the end of tutorial: How to upload Product Videos in Magento 2 .
  In the Product Detail, you can upload as many images as you need for a product, simultaneously, link to video, rearrange their order, and determine how each is used. For each product, three roles are available for you to assign to any image. You can set the main image or the base image that must be large enough to produce the magnification that is needed for zoom. Apart from the base image, a small image of that image will appear in product listing, and a thumbnail will be in the shopping cart. The assign is flexible for you, however, by default, these roles are auto-assigned to the first uploaded image.
 How to upload Images Product in Magento 2 as following optionsTo Upload Images Product:
 Assign the Bass Image
 Reorder Images
 Delete an Image


 To configure notifications:
 To set single store mode:
 To log in to your Magento account:
 Ref: Magento 2 user guide It comes to the end of tutorial: How to create Magento Connect Account .
  Each one of these folders represents a module in Magento 2 where templates or assets are overridden in this theme. The location of the default versions of each module can be found inapp/code/Magento Let’s take a look at the structure of a typical module.
 Here is an example of the checkout module in a custom theme. As you can see, it contains a folder for layout updates (more on that later) one for templates and a “web” folder, which replaces the old skin/frontend/<package>/<theme> folder. However, instead of having all your sitewide assets and JS in this folder, such items are now organised per module - in this case, the Magento Checkout module.Those of you with a keen eye may also have noticed that there is a template folder in the web folder of this module. This is unique to a few Magento 2 modules (including Checkout) where Magento 2 employs KnockoutJS for templating. We’ll look at KnockoutJS in more detail in a later tutorial. These templates use .html files and internal logic (i.e. no PHP is involved).As explained earlier, if you want to override / amend the core modules’ templates and JS, you will need to create an equivalent module folder in your theme that matches the path(s) of the file(s) you wish to override / extend.Taking another example, if you take a look in app/code/Magento you will see all of the default modules used by Magento 2 core. If you want to override something in the Catalog module, for example, you would then need to create a folder in your theme called Magento_Catalog. This references the <package_name>, in this case the “Magento” portion of app/code/Magento i.e. app/code/<package>, and then the portion after the underscore refers to the module name. In this case, this is Catalog: app/code/<package>/<module>In other words, to override the contents of a module in app/code/<package>/< module> app/code/<package>/<module>, you will need to create a folder named <package>_<module> in your theme.Also note that you can only override the contents of the view/frontend portion of the module within your theme (so app/code/Magento/Catalog/view/frontend maps toapp/design/frontend/<your_package>/<your_theme>/Magento_Catalog ). If you need to override Controllers and Blocks, this is done in a different location and normally by a backend developer, which is not covered in this guide. It comes to the end of tutorial: Magento 2 Layout, Block & Template Ultimate Guides .
 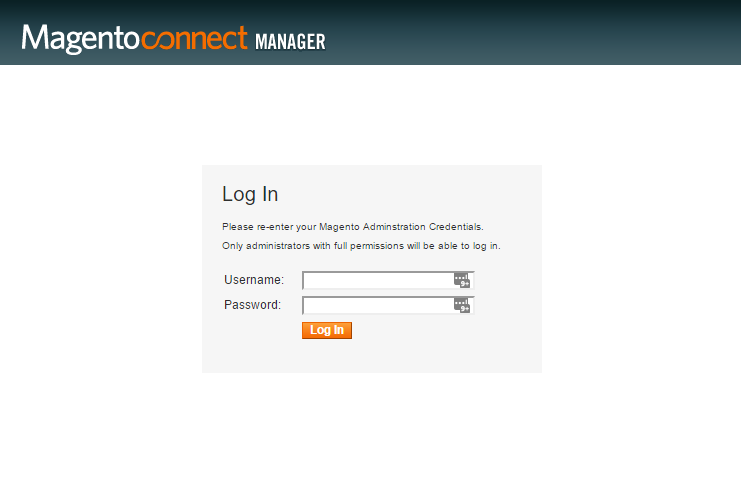 Try to login with admin account and you can see
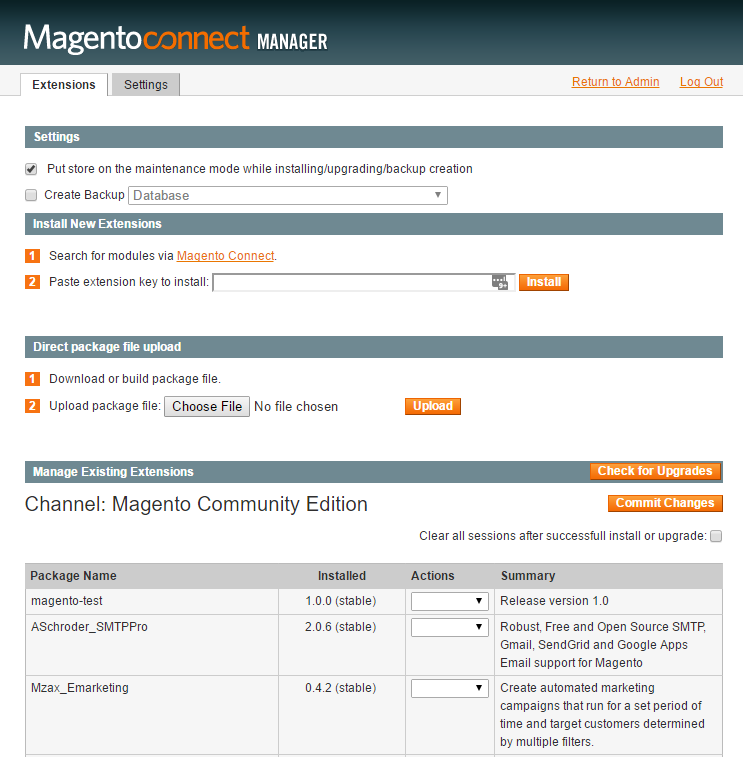 Now to go Magento Connect to get an extension key. In this post, I take an example:
 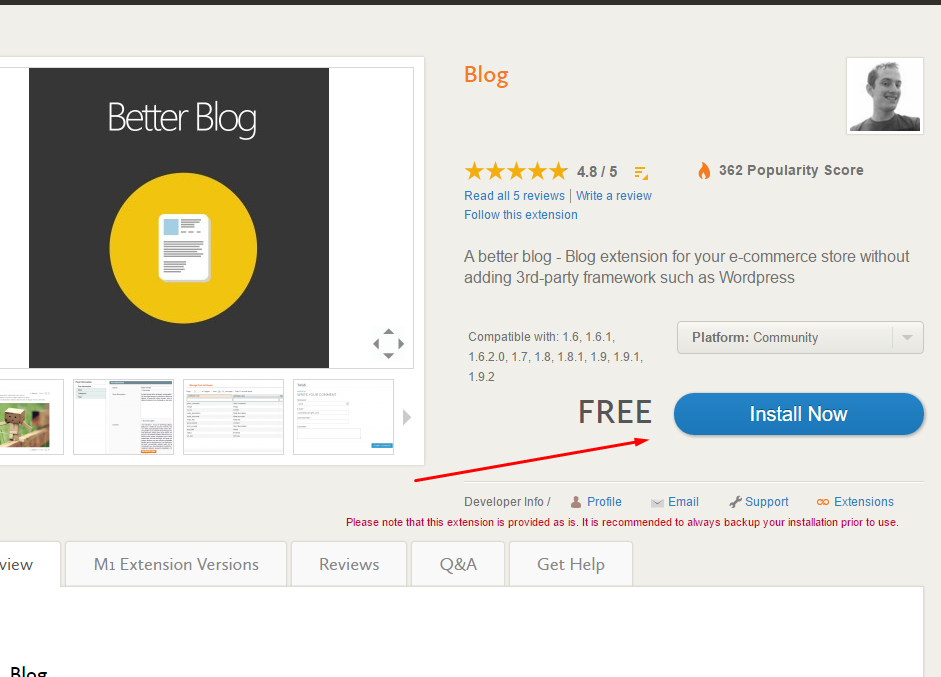 Here are key
 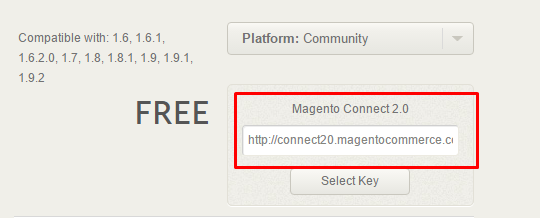 Then paste the key to install and click Install button, then click Process to download and install the Better Blog extension on your Magento store.
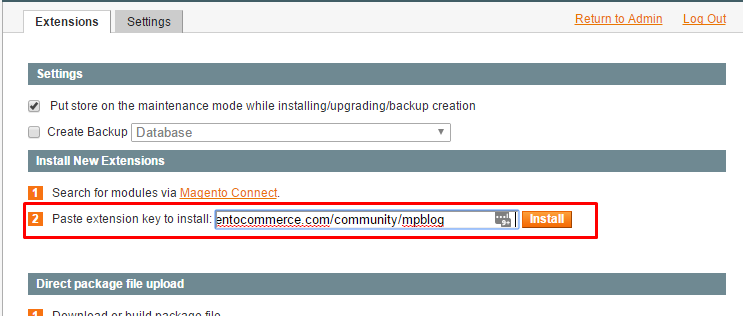 Message
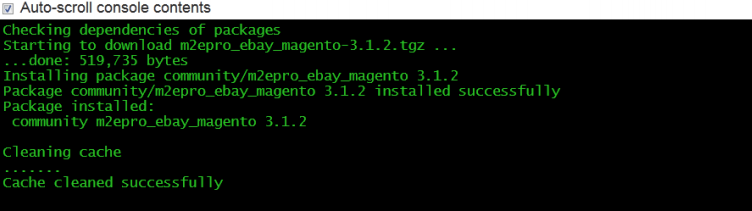 Ref: Magento 2 User Guide It comes to the end of tutorial: How to install Magento Extension from Magento Connect Marketplace .
  To Creat Magento 2 Theme Ultimate:
 Layout files types and conventions
 Set up store information:
 To set the store locale:
 In addition, Country Options determines the country where your business is located, and which countries you accept payment.
 To set up the state options:
 It comes to the end of tutorial: How To Stop Brute Force Attacks in Magento 1, 2 .
  Click NextImportant!
 Backend
 It comes to the end of tutorial: How to install Magento 2 step by step .
  After the form is submitted, a thank you message appears. The contact-us-info block contains the form, and can be easily customized.To configure Contact Us form
 When compete, click Save Config.To customize the Contact Us form:

 Magento 2 configuration allows modifying the welcome message easily by following the guides:To change the welcome message:


Bookmarks